Windows 10 je ena najbolj pričakovanih Microsoftovih različic sistema Windows. Čeprav je Windows 8 ustvaril nov trend v svetu namiznih operacijskih sistemov, je imel nekaj težav z zasnovo in zmogljivostjo, ki so bile glavni poudarek Microsofta v operacijskem sistemu Windows 10. Torej, Windows 10 Final Build je bil predstavljen 29. julija 2015 za Desktop kot pa tudi pametne telefone.
Vključeval je veliko sprememb z upoštevanjem napak sistema Windows 8. Pravzaprav gre za napredno različico sistema Windows, vendar se pri različnih uporabnikih vsak dan pojavljajo številne posledice .
Večji del teh posledic so napake, ki se pojavijo pri poskusu opravljanja določene naloge. Številni ljudje so prišli do sporočila o napaki, medtem ko so poskušali odpreti različno programsko opremo in brskalnike znotraj sistema Windows 10. Ta napaka je priložena s sporočilom o napaki, v katerem piše, da se aplikacija ni mogla pravilno zagnati (0xc0000005). Kliknite V redu, da zaprete aplikacijo . Ta napaka se običajno pojavi pri internetnih brskalnikih, vendar ni omejena nanje. Vsaka aplikacija v sistemu Windows se zaradi te napake ne more več odzivati. Torej, to je treba popraviti, da vrne tisto bistveno programsko opremo nazaj v delovanje.

12. 11. 2016: Uporabniki so poročali, da bodo spodaj navedene metode delovale tudi v sistemu Windows 7.
Razlog za napako sistema Windows 10 0xc0000005:
Obstaja več znanih razlogov, ki povzročajo, da ta napaka moti delovanje različne programske opreme v sistemu Windows 10. Eden od razlogov, ki se štejejo za glavni vzrok, je protivirusni program tretje osebe, ki povzroča konflikte z izvršljivimi datotekami in vpliva na njihovo delovanje. Po drugi strani se lahko registri poškodujejo zaradi zlonamerne programske opreme in virusov, zaradi katerih se programi obnašajo nenormalno. Včasih so krivec za to napako tudi slabi gonilniki strojne opreme .
Rešitve za odpravo napake Windows 10 0xc0000005:
Na podlagi zgoraj omenjenih razlogov so rešitve naravnost naprej. Torej, preberite naslednje metode, da se znebite tega motečega sporočila o napaki.
Popravite poškodovane sistemske datoteke
Prenesite in zaženite Restoro, da boste od tukaj lahko optično prebrali in obnovili poškodovane in manjkajoče datoteke . Pred nadaljevanjem spodnjih rešitev je pomembno zagotoviti, da so vse sistemske datoteke nedotaknjene in da niso poškodovane.
1. način: odpravljanje protivirusnega programa
Protivirusni programi lahko vplivajo na izvršljive datoteke številnih programov. Če želite torej odpraviti to težavo, morate onemogočiti neodvisni protivirusni program, da preverite, ali je bil krivec ali ne. Upoštevajte, da lahko onemogočanje protivirusnih programov povzroči resne grožnje računalniku, ko je povezan z internetom.
Zanesete se lahko tudi na lastno varnostno programsko opremo sistema Windows, tj. Windows Defender . Ima enako funkcionalnost kot kateri koli drug protivirusni program. Protivirusni program lahko onemogočite tako, da se pomaknete do njegovih nastavitev in izklopite ščit.

Ko je onemogočena, znova preverite, ali je prišlo do napake. Če še vedno vztraja, pojdite na naslednjo metodo.
2. način: popravljanje registrov
Register je osrednja zbirka podatkov sistema Windows, da se vaš računalnik nenehno uporablja za pomoči, ki jo bere več različnih datotek in nastavitev, ki jih potrebuje za zagon. Registri se lahko poškodujejo zaradi poškodb nekaterih datotek, potrebnih za skladanje vsega na svoje mesto. Zato večina strokovnjakov priporoča, da poskrbite za varnostno kopijo registra in to varnostno kopijo shranite na običajni ključek USB, da boste lahko v primeru poškodbe registra oživili v prejšnjem stanju. Če pa niste ustvarili varnostne kopije registra, sledite tem korakom, da popravite registre, da odpravite napako 0xc0000005 .
1. Prenesite programsko opremo za čiščenje registra s te povezave .
2. Ko je naložen, ga namestite s priporočenimi nastavitvami. Po namestitvi odprite programsko opremo.
3. V vmesniku kliknite zavihek Registry v levem podoknu in kliknite gumb z oznako Scan for Issues (Iskanje težav) . Začel bo iskati napake v registru in ko bo iskanje končano, se bo aktiviral gumb Popravi izbrano težavo . Kliknite ta gumb in vse bo popravljeno.

3. način: odpravljanje okvarjenih gonilnikov
Gonilniki so programi, ki pomagajo računalniku komunicirati s strojno opremo, ki je nanj pritrjena. Torej, ko so poškodovane, strojna oprema ponavadi povzroča napake . Odpravljanje teh pokvarjenih potapljačev vam lahko pomaga na več načinov. Sledite spodnjim korakom.
1. Odprite upravitelja naprav, tako da pritisnete Win + X in ga izberete s seznama.
2. V upravitelju naprav se pomaknite navzdol in preverite, ali je v strojni opremi rumena oznaka. Če je, kliknite z desno miškino tipko in izberite Posodobi programsko opremo gonilnika . Če ste nedavno namestili gonilnike, znova namestite tudi te gonilnike.

3. V oknu, ki se prikaže za, kliknite Samodejno iskanje za posodobljeno programsko opremo gonilnikov, da omogočite samodejno iskanje in namestitev gonilnikov. Če ste gonilnike prenesli ročno, kliknite spodnjo možnost, da jih poiščete in namestite. Ko je postopek končan, preverite, ali je prišlo do napake.

4. način: popravite BCD
To metodo naj uporabniki izvajajo na lastno odgovornost. Pri nekaterih je to delovalo, pri nekaterih pa ne. Po izvedbi korakov v tem priročniku boste morali ponovno aktivirati sistem Windows.
- Držite Windows Key in pritisnite X . Izberite ukazni poziv (skrbnik)
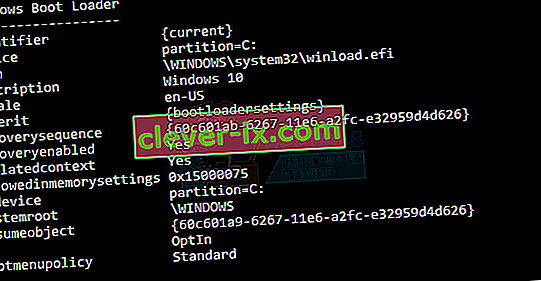
- Vnesite » bcdedit« in pritisnite ENTER. Če je pot zagonskega nalagalnika Windows xOsload.exe, morate odstraniti nekaj datotek in popraviti BCD. To lahko vidite v polju PATH po izvedbi ukaza “ bcdedit”.
- Ko končate, izvedite naslednje ukaze spodaj, nekateri se lahko vrnejo, da niso našli, vendar napake prezrejo in nadaljujejo do zadnjega. Po vsakem ukazu pritisnite tipko ENTER.

Del D: \ Windows \ System32 \ xOsload.exe Del D: \ Windows \ System32 \ xNtKrnl.exe Del D: \ Windows \ System32 \ Drivers \ oem-drv64.sys attrib c: \ boot \ bcd -h -r -s ren c: \ boot \ bcd bcd.old bootrec / rebuildbcd
5. način: Preverjanje posodobitev sistema Windows
Posodobitve sistema Windows pogosto vsebujejo popravke za nekatere napake in napake, znane pa so tudi po tem, da se umaknejo novim težavam v računalnikih ljudi. Vendar bomo v tem koraku preverili, ali so na voljo posodobitve za vaš operacijski sistem, ker Microsoft pogosto odpravlja težave, ki izhajajo iz njihovih posodobitev. Če želite to narediti, sledite spodnjim navodilom.
- Pritisnite "Windows" + "I", da odprete nastavitve sistema Windows.
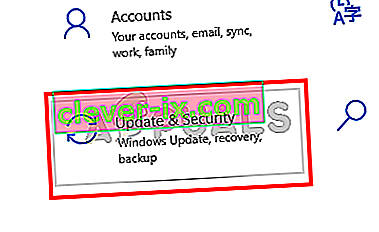
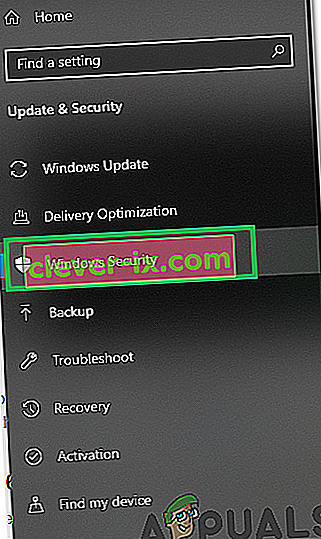
- V nastavitvah kliknite možnost »Posodobitve in varnost« in na levi strani izberite možnost »Windows Update« .
- Na naslednjem zaslonu kliknite možnost »Preveri posodobitve« in sistem Windows samodejno pozove, da preveri, ali so na voljo posodobitve.
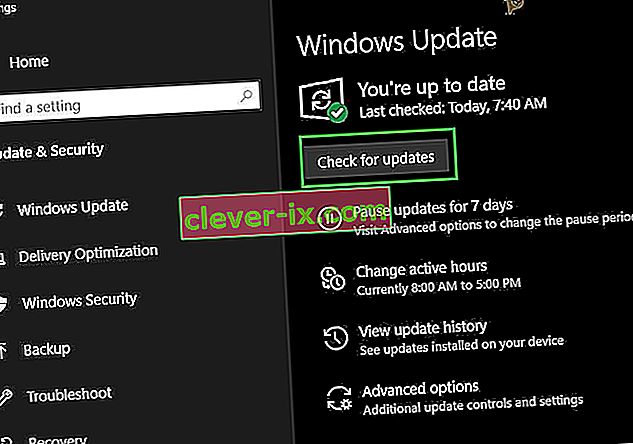
- Ko je preverjanje posodobitev končano, kliknite gumb »Prenos«, da sprožite prenos in namestitev novih posodobitev v računalnik.
- Po namestitvi teh posodobitev preverite, ali je s tem težava odpravljena v računalniku.


6. način: Obnovitev računalnika
Če ste to težavo šele začeli dobivati, se morda sproži zaradi napačne namestitve gonilnika ali celo zaradi neumne aplikacije, ki ste jo morda nedavno namestili v računalnik. Zato bomo v tem koraku stanje računalnika povrnili na prejšnji datum in upajmo, da bo to odpravilo našo težavo, če je bila posledica zgoraj navedenih razlogov. Če želite to narediti:
- Pritisnite “Windows” + “R”, da odprete poziv za zagon.
- Vnesite "rstrui" in pritisnite "Enter", da odprete okno za upravljanje obnovitve.

- Kliknite »Naprej« in označite možnost »Pokaži več točk za obnovitev« .
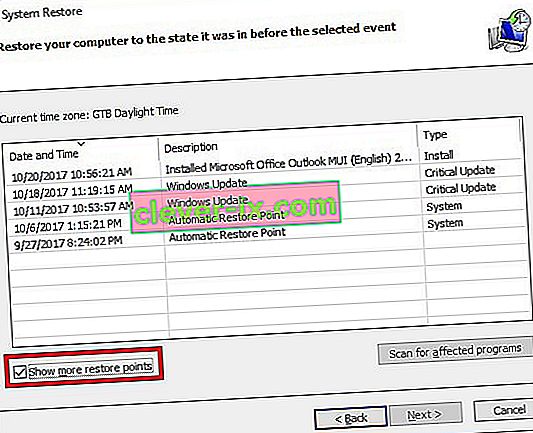
- Na seznamu izberite obnovitveno točko pred datumom, ko se je ta težava začela pojavljati.
- Ponovno kliknite »Naprej« in sledite navodilom na zaslonu, da vrnete vse nazaj na izbrani datum.
- Po končani obnovitvi preverite, ali težava še vedno obstaja.


7. način: omogočite požarni zid
V nekaterih primerih se napaka sproži, ker je aplikacija sumljiva ali vsaj, če je bila označena kot sumljiva in požarni zid Windows v vašem računalniku ne deluje, da bi to potrdil. V tem koraku bomo poskrbeli, da bo omogočen požarni zid Windows, da se znebimo te napake. Za to:
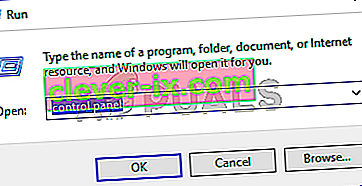
- Pritisnite “Windows” + “R”, da odprete poziv za zagon.
- Vnesite »Nadzorna plošča« in pritisnite »Enter«, da zaženete klasični vmesnik nadzorne plošče.
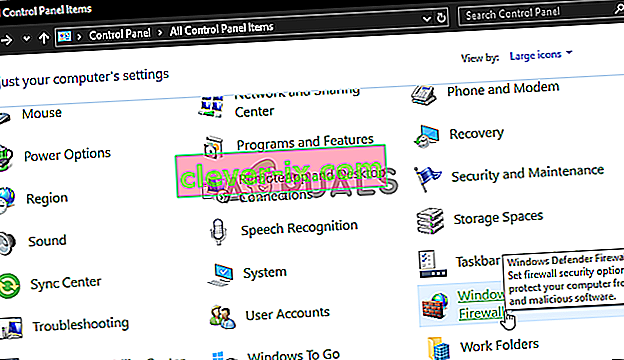
- Na nadzorni plošči kliknite možnost »Pogled po:« in izberite gumb »Velike ikone« .
- Po izbiri kliknite možnost »Požarni zid Windows Defender« , da zaženete požarni zid in nato izberite »Vklopi ali izklopi požarni zid Windows Defender«.
- Preverite »Vklopi požarni zid Windows Defender« za obe razpoložljivi možnosti za vklop požarnega zidu.
- Po izbiri shranite spremembe in zaprite pred oknom.
- Po tem preverite, ali težava še vedno obstaja.


8. način: Zaženite SFC Scan
V nekaterih primerih ste morda v računalnik namestili slab gonilnik ali v določenem trenutku zaradi okvare shrambe morda poškodovane nekatere sistemske datoteke ali gonilniki. Zato bomo v tem koraku izvedli popoln sistemski pregled, da bomo ugotovili morebitne gonilnike, v katerih manjkajo podpisi, ali odpravili nepravilnosti v sistemskih datotekah. Za to:
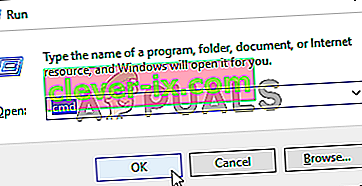
- Pritisnite „Windows ' + „ R “, da odprete poziv za zagon.
- Vnesite "cmd" in pritisnite "Shift" + "Ctrl" + "Enter", da zagotovite skrbniška dovoljenja. Zagon ukaznega poziva
- V ukazni poziv vnesite naslednji ukaz in pritisnite "Enter", da ga izvedete.
sfc / scannow
- Let the computer scan for any broken or corrupted items and it should automatically replace them with working ones.
- Check to see if doing so fixes the error message.

Method 9: Disabling Data Execution Prevention
Data Execution Prevention is a program that prevents certain programs or executables from being able to run on your computer because it suspects that they might be viruses. Due to this prevention, sometimes, as a false alarm, legit applications might also face issues while trying to run on your computer. Therefore, in this step, we will be disabling this setting from the system configuration panel. For that:
- Press ‘Windows’ + “R’ to open the Run prompt.
- Type in “Control Panel” and press “Enter” to launch the classical control panel interface.

- Inside the Control Panel, click on the “View By:” icon and then select the “Large Icons” option.
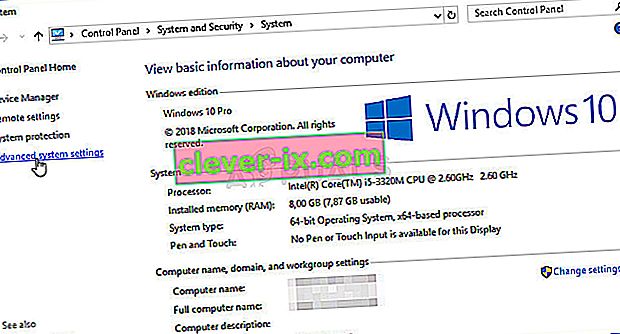
- After selecting Large Icons, select the “System” option.
- Click on the “Advanced System Settings” option on the left side of the screen.
- In the advanced System Settings, click on the “Advanced” tab from the top.
- In the advanced tab, click on the “Settings” option under the “Performance” heading.
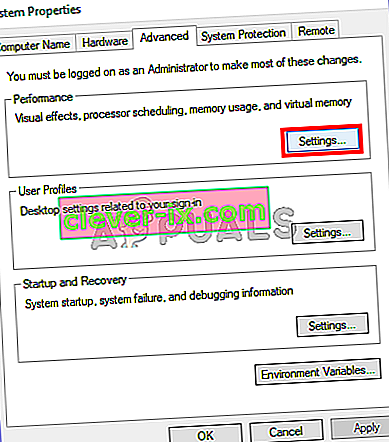
- On the next window that opens up, click on the “Data Execution Prevention” tab, and then select the “Turnon DEP for all programs except thoseI Select” option.
- After that, click on the “Add” option and point to the executable of the application that you are facing issues with.
- This way, that application will no longer come under the jurisdiction of the DEP program.
- Check to see if doing so has fixed the issue.


If the above process is unable to fix the issue, it might be because the executable isn’t the only one being affected by the DEP program. Sometimes the DEP might actually be preventing a herd of executables from being run on the computer and to counter this we will be disabling DEP completely.
Disabling DEP completely cannot be done through any Windows setting and it needs to be done manually through the command prompt. Remember to take this step as a last resort because this can in some cases makes your computer more vulnerable to viruses and malware attacks. In order to disable DEP through the command prompt:
- Press “Windows” + “R’ to open the Run prompt.
- Inside the Run prompt, type in “cmd” and then press “Shift” + “Ctrl” + “Enter” to launch in admin mode.
- Inside the command prompt, type in the following command and press “Enter” to execute it on your computer.
bcdedit.exe /set {current} nx AlwaysOff - Once the command has been executed, run the application that you want to and check to see if the error message still persists.
Method 10: Disable Firewall and Windows Defender
In some situations, the executable that you want to run on the computer might actually be blocked by the Firewall and it would not be able to make contact with its servers this way. Therefore, we will have to allow the executable in our Firewall for both public and private networks which should get it working if the Firewall is preventing it.
In addition to that, sometimes the Windows Defender might prevent the application from running on your computer because its local files might be suspicious and not properly signed. This can be due to a false alarm as well so we will be disabling the Windows Defender for the application as well by adding an exclusion. In order to do that:
- Press “Windows” + “R” to launch the Run prompt.
- Type in “ControlPanel” and press “Enter” to launch the classical control panel interface.
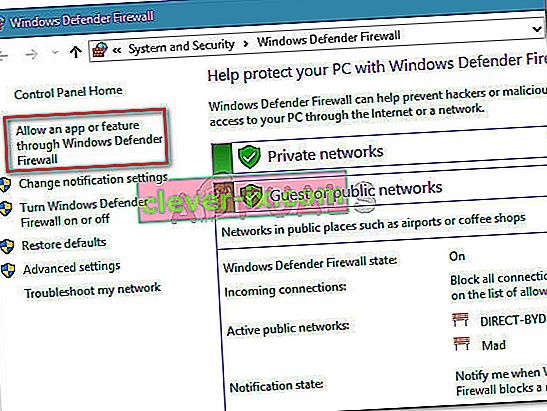
- Click on the “View by:” button, select “Large Icons” and then click on the Windows Defender Firewall option.
- Select the “Allow an app orfeature through the Firewall” button on the left pane and then click on the “Change Settings” button and accept the prompt.
- From here, make sure that you check both the “Public” and the “Private” options for the application and its entries.
- Save your changes and exit out of the window.
- After that, press “Windows” + “I” to launch the settings and click on the “Updateand Security” option.

- From the left pane, click on the “Windows Security” button and then click on the “Virus and Threat Protection” button.
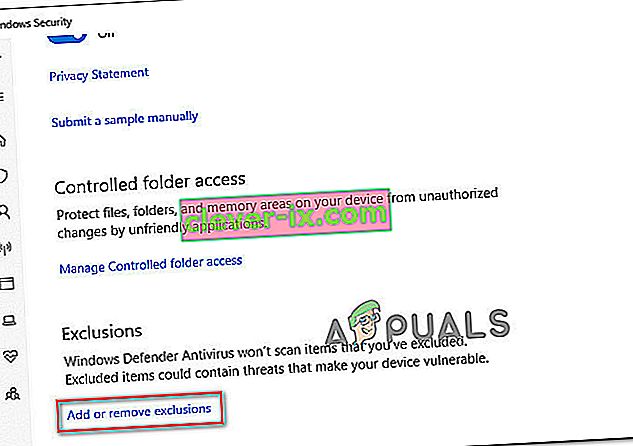
- Select the “Manage Settings” button under the Virus and Threat Protection Settings heading.
- Scroll down and click on the “Add or Remove Exclusions” button in the next window.
- Click on the “Add an Exclusion” option and select “Folder’ from the File type.
- Make sure to specify the application’s folder with which the issue is occurring and exit out of this window after saving your changes
- Check and see if doing so has fixed the error message.


Method 11: Reinstall Firefox
If you are getting this error while trying to launch Firefox, it might be occurring because the applications haven’t been installed properly on your computer. Therefore, in this step, we will be launching the app management window and uninstalling Firefox after which we will reinstall it completely by downloading it from the Firefox website. For that:
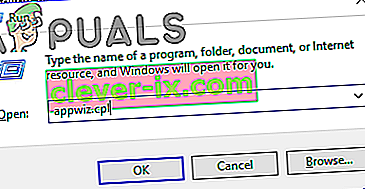
- Press “Windows” + “R” to open the Run prompt.
- Type in “appwiz.cpl” and press “Enter” to open the app management window.
- In the app management window, scroll down and right-click on the “Firefox” application.
- Select “Uninstall” from the list and then follow the on-screen instructions to remove the software from your computer.
- Repeat this step for all instances and bundled applications of the software installed on your computer.
- Make sure to disable any third-party antiviruses at this point to make sure that the software is installed smoothly.
- Head on over to the Mozilla website and click on the download button.

- Click on the downloaded executable and install it on your computer following the on-screen instructions.
- Check to see if doing so has fixed the error message on your computer.


Method 12: Scanning for Malware
It is possible in some cases that the computer has acquired malware that is preventing the user from being able to run all the system functions on their computer. Therefore, in this step, we will be using the default Windows Defender to scan our computer thoroughly for any viruses or malware that might’ve found its way on our computer. For that:
- Press the “Windows” + “I” keys simultaneously on your PC to open the Settings tab.
- Navigate to the Update& Security option and then click on the “Windows Security” button on the left tab.
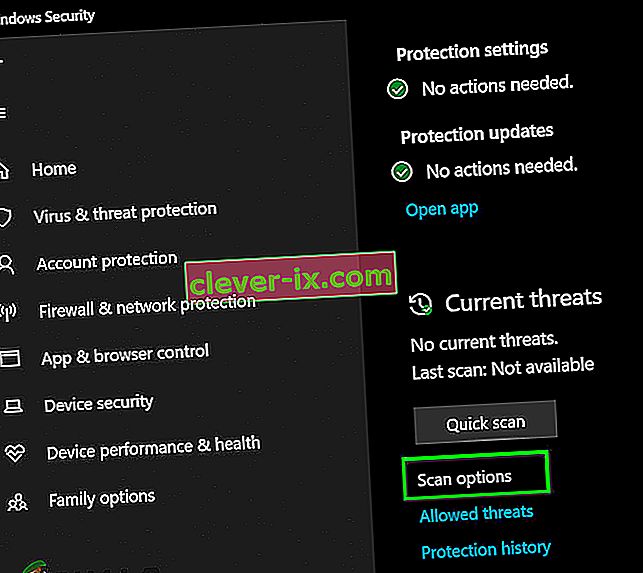
- After that, click on the “Open Windows Security” and select the “Virus and Threat Protection” option.
- After that, click on the “Scan Options” button below the “Quick Scan” window.
- Click on the “Full Scan” option and then hit the button of “Scan Now”.
- Wait for a few seconds while this process gets completed and then finally check if the error gets resolved now.


Microsoft Security Scanner is an additional tool that you can use to test the system for any further viruses and malware because sometimes the default tool isn’t able to perform the scan properly. Therefore, in this step, if the issue still hasn’t been resolved, we will be using the Microsoft Security Scanner to further make sure for any issues.
- Launch your browser and download the Microsoft Security Scanner from here.
- After downloading the executable, run it on your computer and let it install.
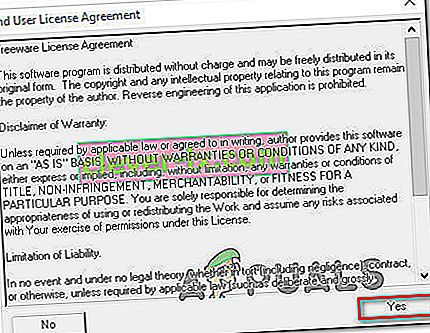
- Accept the License Agreement terms and click on “Next”.
- Select “Full Scan” and click on “Next”.
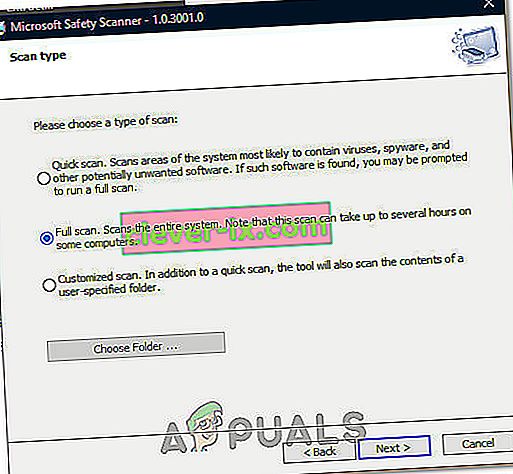
- After you opt for a full scan, the software will start scanning your entire computer to look for any malware or viruses that might’ve disguised themselves as normal executables or applications.
- After this scan has been finished, check to see if the error message still persists.


Method 13: Install Missing Drivers
It is possible in some situations that your device is missing certain drivers due to which this particular issue is being triggered on your computer. Therefore, we will be checking for any missing drivers and then we will check to see if the error is fixed. In order to do this, follow the guide below.
- Download Driver Easy on your computer.

- Run the downloaded executable and install the software on your computer.
- Run the check and see if there are any missing drivers on your computer.
- Install these missing drivers and then install them either manually or automatically using the Software.
- After installing all the missing drivers, check to see if the issue still persists.

Method 14: Reconfigure Registry
It is possible that in some cases, you haven’t properly configured all the registry settings or that you unknowingly configured something incorrectly. Therefore, in this step, we will be reconfiguring our Registry to fix a certain key that sometimes, if misconfigured, causes this particular error on Windows. In order to do this, follow the guide below.
- Press “Windows” + “R” to open the Run prompt.
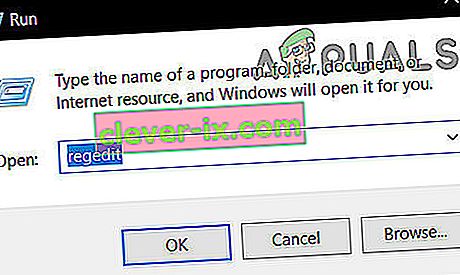
- Type in “regedit” and press “enter” to launch the registry editor.
- Inside the registry editor, navigate to the following location.
HKLM\SOFTWARE\Microsoft\Windows NT\CurrentVersion\Windows\AppInit_Dlls
- Double click on the “LoadAppInit_DLLs” entry on the right side of the screen.

- Change the value of this registry from “1” to “0”.
- Save your changes and exit the registry editor.
- Check to see if doing so has fixed the error.


Method 15: Update Disk Drivers
In some cases, the Disk Drivers that are being used to control your Storage and other Disks installed on the computer might have been outdated due to which the error is being triggered. Therefore, in this step, we will first be opening the Device Management Window and from there, we will be updating these drivers. In order to do so, follow the steps mentioned below.
- Press “Windows’ + “R” to open the Run prompt.
- Type in “Devmgmt.msc” and press “Enter” to launch the device management window.

- In the Device Manager, double click on the “DiskDrives” option to expand it.
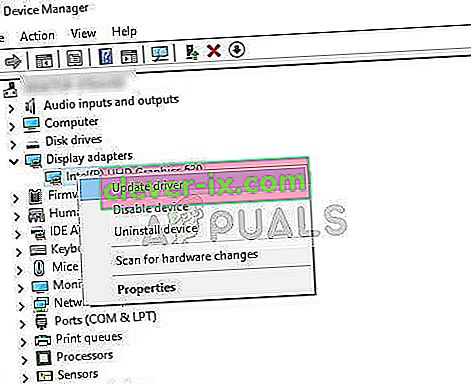
- Right-click on the storage device listed and select the “Update Driver” option.
- Select the “Search Automatically for Drivers” option and let the setup search.
- If there are any drivers available, Windows will automatically check for them and install them on your computer.
- Check to see if doing so has fixed the issue.


Method 16: Disabling Automatic Updates and Uninstalling Updates
It is possible in some cases, that this error is stemming from a faulty update install. Microsoft is notorious for pushing out updates that aren’t properly customized to work for all hardware combinations and often go on to break things instead of making them better. Therefore we will make sure that the recent update isn’t installed on our computer.
In order to do this, we will have to first disable automatic updates on our computer and then we will be uninstalling the recently installed updates. Make sure to back up any important data that you don’t want to lose just in case this goes bad.
- Press “Windows” + “R’ to open the Run prompt.
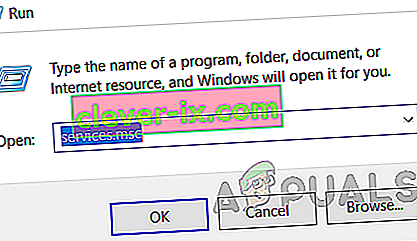
- Type in “service.msc” and press “Enter”.
- Scroll through the list and double click on the “Windows Update” service.
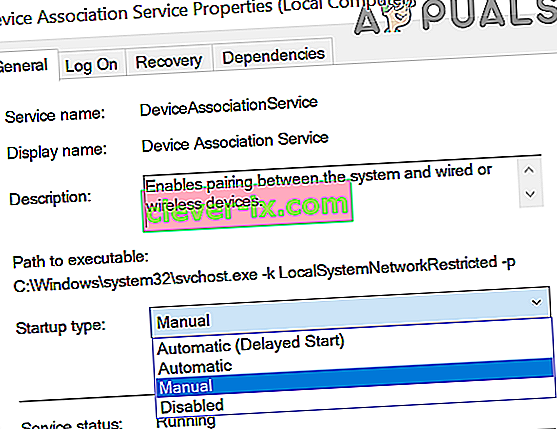
- Click on the “Stop” button and then click on the “Startup Type” dropdown.
- Select “Disabled” from the list and select the “Apply” button from the window.
- Click on “OK” to close out of this window.
- Check to see if doing so has stopped your computer from updating.


After stopping the computer from updating, we will now be uninstalling the recent updates that have been installed on your computer. For that:
- Press “Windows” + “I” buttons to open the settings.
- In settings, click on the “Update and Security” option and then select the “Windows Update” button from the left pane.

- In the Windows Update, click on the “View Update History” option.
- In the Update History, click on the “Uninstall Updates” option and it should take you to the uninstallation screen where all the recently installed updates will be listed.
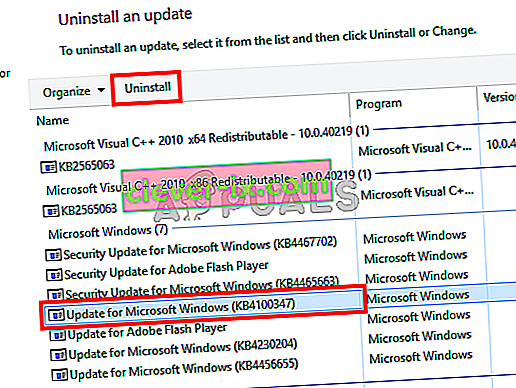
- From the list, right-click on the update that was installed recently and caused this error on your computer.
- Right-click on this update and select the “Uninstall” button to remove it completely from the computer.
- Follow through with the on-screen instructions.
- Check to see if uninstalling has fixed this issue.


Additional Fixes:
- In addition to some of the recommendations given above, you should try to check if there are any bad memory modules (RAM) installed on your computer which can be a cause of this.
- Preverite tudi, ali niste RAM-a overclockali na raven, ki presega priporočeno mejo. Če ste to storili, ga poskusite vrniti na tovarniške nastavitve in preverite, ali to odpravlja vašo težavo.


